jQuery Intro
Christopher M. Church, Scott P. McGinnis
UC Berkeley D-lab
1. Bookmarklets
A bookmarklet is a small bit of javascript code that runs in your browser via a bookmark. We're going to put two bookmarkelts into your bookmark bar in Chrome. Make sure your bookmark bar is enabled.
jQuerify bookmarklet
drag the following link into your bookmarks bar: Load jQuery
for more info about this bookmarklet, click here.
pjscrape bookmarklet

drag the following link into your bookmarks bar: Load Pjscrape
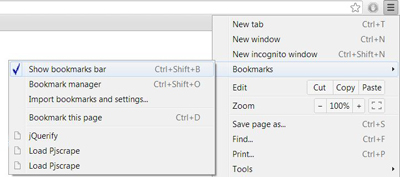
Then, to enable on any particular page, just click the link on your bookmark bar, which should now look like the image to the right
for more info about this bookmarklet, click here.
manually add jquery to any page from the console
If you don't want to use a bookmarklet, you can manually add jQuery with the following console commands.
		var jq = document.createElement('script');

		jq.src = "//ajax.googleapis.com/ajax/libs/jquery/1.8.3/jquery.min.js";

		document.getElementsByTagName('head')[0].appendChild(jq);

		jQuery.noConflict();

2. Using Chrome Developers' Tools (Javascript Console)
Chrome has a powerful set of tools designed for developers. To access it, you can either right click and inspect an element, or select it from the menu.
log something to the console
(note: ignore the "undefined" - it just means that the console.log function returns no value)
console.log('Hello, World!');
create a variable and then log that variable to the console
		var my_variable = 'hello world';

		console.log(my_variable);
3. Some basic jQuery
jQuery is a simplification of JavaScript used to select and manipulate a lot of elements at one time. Click here for more details
It follows the basic format:
$('SELECT SOMETHING').DoSomething();
Please visit the wiki page on XML Once on the wiki page, click on your jQuery bookmarklet and then open the Javascript Console. We are going to enter the jQuery commands below into the JavaScript console and see what they do. Note: the title bar of the Console will tell you what page you are currently acting on.
select all paragraph elements
$('p');
turn all paragraph elements blue
$('p').css('color','blue');
select just the text of all paragraph elements
$('p').text();
log all paragraph text to the console
console.log($('p').text());
log all paragraph text to the console with a newline added after each paragraph
		var ptext='';
		$('p').each(function() {ptext = ptext +'\n' + $(this).text();});
		console.log(ptext);
log every link url to the console:
$('a').each(function(){console.log($(this).attr('href'));});
put all header <h4> elements into our output textarea
		var txt=''; //declare variable
		$('h4').each(function() {txt = txt + $(this).text()+'\n';}); //find each h4 element and add it to variable txt
		$('#output').val(txt); //put the txt variable into the output field
4. Read in an xml file - for more detailed instructions, see here
To read local files in Chrome, you need to allow this with the command line switch "chrome.exe --allow-file-access-from-files" Since we are on a webserver, we can only load files from the same domain. This is called the Same Origin Policy.
We are now going to load the xml file "books.xml" (from PaperMashup) into this page and manipulate it, pulling out elements and changing them.
First, take a look at "books.xml" to see what it contains.
Setting a variable, load XML, and then send it to our output textarea
We are now going to load the xml file.
You can run the following code, which loads the XML and then runs the selection
		$.ajax({
			type: "GET",
			url: "xml/books.xml",
			dataType: "xml",
			success: function(xml) {
				$('#output').val($('Book',xml).text());
				}
		});
Or you can do it line by line, and store the XML file in a variable. This allows you to keep looking through the XML document without reloading it every time.
var xmlDoc;
		$.ajax({
			type: "GET",
			url: "xml/books.xml",
			dataType: "xml",
			success: function(xml) {xmlDoc=xml;}
		});
$('#output').val($(xmlDoc).find("Book").text());
Notice that you can skip the .find() command by defining what to scan in the selector (selector, where to look)
$('#output').val($('Title',xmlDoc).text()); We are now going to add a new attribute to each book element. The attribute will be called "subject" and the value will be "programming".
$('Book',xmlDoc).attr('subject','programming'); Now find the book that contains the string "SQL" and mark it as containing "SQL"
$("Book:contains('SQL')",xmlDoc).attr('subject','MySQL');Now try to find the book that contains the string "php" and mark its subject as containing "php"
Click here to reveal the answer
Convert back to string, so we can output the changed xml to a page, or to our output textarea
xmlString = (new XMLSerializer()).serializeToString(xmlDoc);
Output our changed XML file to the output textarea
$('#output').val(xmlString);
